Saturday, April 28, 2012

Don't Sweat the Aubergine - sponge cakes

A second extract from the new edition of my book Don't Sweat the Aubergine. The first edition gave no cake recipes, largely because I'm an inexperienced and inexpert baker. But it struck me that a book that purports to tell you how and why things work in the kitchen ought to have a section on this branch of cookery, in which, you could argue, some knowledge of the technicalities is particularly important.

I start with a bit of theory, and follow with three basic sponge recipes.

Sponge cakes

If a net is, according to Samuel Johnson, “holes tied together with string”, a cake may be described as bubbles contained by batter. You create the bubbles in three principal ways:

Beating (creaming) butter and sugar
Incorporating a raising agent, either by using self-raising flour or by adding baking powder (and/or, in some recipes, bicarbonate of soda, an ingredient of baking powder)
Creating an egg foam

The recipes here involve various permutations of these methods. But let’s start with the technical stuff, some of which applies not only to cakes but to other sweet things in this chapter.

HOW/WHY YOU DO IT
1) Equipment. Springform cake tins of 20cms and 23cms will cover a good many recipes. If you’re making a sponge sandwich, you’ll need two 20cm tins.

2) Lining and greasing the tin. Place the cake tin on a piece of greaseproof paper, draw round it, and cut along the pencil mark. Smear a very small piece of butter on the base of the tin, stick the round piece of paper on top, and smear a little oil on the surface of the paper and round the sides of the tin. Oil works better than butter as a non-stick agent, because the solids in butter can be adhesive.

3) Creaming. Generations of (mostly) schoolgirls suffered arm ache as they spent domestic science lessons – as they used to be known - mashing margarine, butter or some other shortening ingredient into sugar, and laboriously working away at the mixture until it lightened. These days, chefs tend to use hand-held mixers or food processors. Both machines require some manual intervention during the creaming process, because the mixture clogs up until it becomes properly amalgamated.

A creamed butter/sugar mixture, the texture of double cream, contains lots of air bubbles. It also separates the grains of flour, preventing lumps. This is why fats are known as “shortenings”: they interrupt the formation of gluten, which is a long chain of protein molecules.

4) Sifting flour. Unnecessary, despite what recipes may say. You are unlikely to find weevils left behind in your sieve; and any airiness you give to the flour now will be lost when you stir it into the batter.

5) Separating an egg. Crack the egg on the edge of a bowl, and allow the white to pour in. Gently, with your hand held over the bowl and your fingers straight, tip the yolk on to your fingers, opening them slightly to allow further white to slip through. Moving the yolk from hand to hand can encourage this process. (I got this technique from the opening sequence of a TV biopic of Elizabeth David.)

6) Whisking whites. Try to avoid letting any trace of yolk creep into the egg white. Don’t add salt or, despite what some experts recommend, lemon juice or vinegar: they soften egg whites.

I use a hand-held whisk, feeling that, in spite of the work involved, it enables me more accurately to judge the progress of the foam.

Use a large bowl, and tip it towards you, so that the whisk gets access to as much egg white as possible. You should stop beating when the whisk, lifted from the foam, creates peaks, which do not subside. It’s tempting to carry on, just to make sure you’ve got the right consistency. Resist. Further beating causes the peak stage rapidly to be succeeded by collapse.

7) Dropping the cake. In The Science of Cooking, Peter Barham offers the bizarre recommendation that, on removing the cake from the oven, you drop it from a height of about 30cms on to a hard surface. (An average ruler is about 30cms long.) The theory is this: as a cake cools, the air bubbles in it deflate, like collapsing balloons. Dropping the cake allows some of the bubbles to break, letting in air, which sustains the structure.

8) Turning out. Some recipes recommend that you wait five minutes, just long enough for the cake to contract from the side of the tin, before turning it out on to a wire rack. If you do this, place the cake top-side (the firmer one) down. I find that bits of cake stick to the rack anyway, and I usually allow the cake to cool in the tin.

Basic sponge
This sponge does contain a certain amount of gluten, which you create when you blend the flour with the sugar and butter, and when you stir in the eggs. If you have ever handled bread dough, which has a lot of gluten, you’ll know that it has an elastic quality. Here, that elasticity maintains the structure of the cake as the air bubbles expand. If the structure were to break and the bubbles to pop, the cake would collapse. The texture of the cake is, nevertheless, foamy.

100g self-raising flour (or plain flour, plus 1tsp baking powder)
100g caster sugar
100g softened butter
1tsp vanilla essence (optional)
2 eggs, beaten


Pre-heat your oven to gas mark 4/180C. Put in a baking sheet.

Line and grease a 20cm springform cake tin.2 – SEE HOW/WHY YOU DO IT, ABOVE

In a food processor, blend the flour, sugar, and butter, in short pulses, until you have a stodgy mass. Tip the mixture into a bowl, and stir in the vanilla (if using – I like it, but you may prefer less, or none at all) and a portion of the egg. Keep adding egg until you have a gloopy batter; it should drop off a spoon, but reluctantly. Don’t feel obliged to use all the egg; but, if you have done so before you get to the gloopy stage, add a little milk too.

Tip the batter into the cake tin, spread it out and level the surface, and put the tin into the oven on top of the baking sheet, which helps to convey the heat. Bake for about 25 minutes, or until an inserted skewer emerges clean.

Drop the cake tin from a height of about 30cms on to a hard surface (I hope the spring is secure).7 Allow the cake to cool before turning it out.8 I keep it in greaseproof paper, wrapped inside foil.

VARIATIONS
Add the zest of a lemon, or of an orange, to the mix. And/or poppy seeds. Or any other dry flavourings.

Make a sandwich: double the ingredients, and divide the batter between two tins, baking the layers side by side.

Fillings. You might go for a cream tea theme, with a layer of jam topped by whipped cream. Or try lemon curd, from Geraldine Holt’s Cakes: 1 lemon; 60g caster sugar; 1/4tsp cornflour; 1 egg; 30g butter. Use a small bowl that will rest in a saucepan of simmering water without the base touching the water’s surface. Grate in the lemon zest, and add the juice too, along with the sugar, cornflour, and egg. Cook the mixture, stirring all the time, above the simmering water. After about five to seven minutes, the mixture should start to thicken. Remove the bowl, and stand it in cold water; while the mixture still has some warmth, stir in the butter in small pieces. Allow the curd to cool before spreading it on the cake.

Victoria sponge
The same ingredients as above, but, you’ll notice, in a different order. Creaming the butter and sugar before adding the egg and gently folding in the flour results in a cake that is lighter in gluten, and that therefore has a lighter texture. The drawback is that the air bubbles are more likely to burst in the less elastic batter, particularly if your mixture is too loose.

100g caster sugar
100g softened butter
1tsp vanilla essence (optional)
2 eggs, beaten
100g self-raising flour (or plain flour, plus 1tsp baking powder)


Pre-heat your oven to gas mark 4/180C. Put in a baking sheet.

Line and grease a 20cm springform cake tin.2 – SEE HOW/WHY YOU DO IT, P000

Cream the sugar and butter until the mixture is soft and fluffy.3 Beat in about three quarters of the egg – this may be enough. Add the vanilla, if you’re using it, and gently fold in the flour. You should have a gloopy batter, which will drop off a spoon, but reluctantly. If the batter is too stiff, gently add more egg. If it’s still too stiff, add a little milk.

Tip the batter into the cake tin, spread it out and level the surface, and put the tin into the oven on top of the baking sheet, which helps to convey the heat. Bake for about 25 minutes, or until an inserted skewer emerges clean.

Drop the cake tin from a height of about 30cms on to a hard surface.7 Allow the cake to cool before turning it out.8 I keep it in greaseproof paper, wrapped inside foil.

VARIATIONS
See the suggestions below the basic sponge recipe, p000. Here’s an extra one: lemon drizzle. Put the zest and juice of two lemons in a bowl, and stir in 100g granulated sugar until dissolved. When you remove the cake from the oven, spoon this syrup all over it.

Genoese sponge
In this sponge, the eggs produce the foam – there is no other raising agent. A cake the size of the sponges described above would again have 100g of flour and 100g of sugar, but with four eggs, and 50g melted butter. You need an electric whisk to beat together the sugar and eggs; eventually, after a good 10 minutes and maybe more, they increase in volume by as much as six times, and become stiff and very pale. Then you fold in the flour. Last (because the fat collapses the air bubbles), you stir in the butter, quickly transfer the batter to the tin, and bake it as in the recipes above.

Saturday, April 21, 2012

Don't Sweat the Aubergine - aubergines

A revised, updated edition of my cookbook, Don't Sweat the Aubergine, comes from Black Swan on 26th April. Here it is, on the publisher's website. And here is what I have to say in the book about aubergines.

Aubergines

Nowhere in the literature of cookery is the sway of received ideas more evident than in the treatment of aubergines. Routinely, recipes advise you that aubergines should be salted, rinsed and dried before cooking. You leave them, sprinkled with salt, in a colander, perhaps with a plate on top to squeeze them a little, for half an hour or so; or, more rarely, you use the technique given in Classic Turkish Cookery by Ghillie Basan, who suggests you soak aubergine cubes or slices in salted water. Recipes may add the gloss that the point of the exercise is "to remove the bitter juices".

Once upon a time, it seems, aubergines were bitter. Some varieties still are, no doubt. But I’ve never found one. In any event, salting probably does not remove bitterness: it disguises it (cf McGee on Food and Cooking).

Supporters of salting who acknowledge the lack of bitterness in modern strains of aubergine advance a second reason for the practice: that pre-salted aubergines do not soak up so much oil when you fry them. It is true that unsalted aubergines soak up all the oil you give them as soon as they touch it. But salted ones soak up quite a lot too; and, if you have cut the vegetable into cubes and are stirring them around, the flesh soon starts sticking to the pan. Stuck bits apart, the cubes are usually still firm after the 10 minutes that recipes tend to give as the cooking time. Aubergine is not nice unless it is soft.

Delia Smith says that pre-salting concentrates the flavour, ensuring that the cooked aubergine won't be watery. I experimented. I pre-salted the cubes of half an aubergine; then I baked it with the cubes of the other half, salted only as I put them in the oven. I tasted each kind. There was no difference between them.

HOW TO COOK THEM
Cut aubergines into cubes. Put them on a baking tray or in a roasting pan, and pour olive oil or sunflower oil over them - about 1 tbsp for each medium-sized aubergine. Add salt, and pepper if you like. Toss with spoons, or with your hands. Cook at gas mark 6/200°C for 20 minutes to half an hour, or until tender.

Recipes such as Parmigiana di melanzane and moussaka require rounds (cut into 1/2cm discs horizontally) or slices (cut the aubergine in two horizontally, then cut 1/2cm vertical slices), according to your preference. Brush them with olive or sunflower oil (if you don't have a pastry brush, pour some oil into a small saucer, dip a fork into it, and brush the aubergine slices with the backs of the tines), season, and bake as above.

VARIATIONS
You can brush slices of aubergine with oil and cook them in a frying pan or a ridged grill pan, or on a barbecue. But I like the flesh of my aubergines to have a melting texture; and I find that texture harder to achieve by frying or grilling than by baking. Frying cubes of aubergine is, in my experience, very unsatisfactory: as I say above, the cubes soak up all the oil, stick to the pan, and take ages to tenderise. However, you can cook them in an pan on the hob if it also contains onions, which provide a moist environment. Cook the onions in oil first for about five minutes, tip in the aubergines with some salt, stir everything around, and cover. Cook on the lowest heat, stirring regularly. The aubergines should be tender in 15 to 20 minutes.

Another way of cooking aubergines is to bake them in their skins, then to mash up the flesh with garlic, oil, lemon, salt and any other flavourings you fancy. Tahini, the sesame paste with the consistency of peanut butter, works well. I like a dash of cayenne or chilli pepper. Cumin, dry roasted in a pan until it gives off a toasty aroma and then ground in a mill or mortar, is also nice. One clove of garlic, finely chopped or mashed, for each aubergine; 1tbsp of tahini; 1tbsp olive oil; 1tbsp of lemon juice; 1tsp of cumin seeds.

There’s a neat way of baking aubergines in Gordon Ramsay’s Kitchen Heaven. You slice the aubergine in half, slash the flesh, sprinkle one half with garlic, add oil, seasoning and, in his recipe, a sprig of rosemary, put the halves together and wrap them tightly in foil, bake at 220°C (gas mark 7) for 45 minutes, then at 110°C (gas mark 1/4) for a further 25 minutes (the aim is to get the flesh really soft). You scoop the flesh (discarding the rosemary, which will have imparted its flavour) into a pan. Then, Ramsay says, you heat it to evaporate the liquid and to achieve a thick, creamy consistency. So Ramsay clearly doesn’t think the juices will be bitter: this technique will concentrate them.

My one variation on Ramsay’s method is to add the oil at the end of cooking, in order to get its full flavour.

My favourite aubergine dish is Parmigiana di melanzane. You slice and bake the aubergines as in HOW TO COOK THEM above, layer them in a dish with tomato sauce (it doesn't matter whether you end up with tomato or aubergines or a mixture on top), put chopped mozzarella on top and grated Parmesan on top of that, then bake at, say, gas mark 4/180°C to blend the flavours and brown the cheese. It's delicious hot, even more delicious at room temperature, and most delicious lukewarm.

Monday, April 09, 2012

Fried chicken - without egg

I read somewhere that it was a solecism, when making southern fried chicken, to dip the chicken in egg before coating it in flour. Flour only, is the rule. I have indeed found that the crusts of my egg/flour fried chicken have been somewhat stodgy.

The coating above consists only of gluten-free flour - which I have found, when making onion bhajis, produces better results than wheat flour – seasoned with salt and a generous quantity of cayenne pepper. I put sunflower oil to a 1cm depth in a frying pan, warmed it over a low to medium heat until a small piece of bread sizzled in it, and fried the chicken pieces with the flame turned right down for 30 minutes, turning once. It was the best I've made.

Saturday, March 31, 2012

Baked salmon with soy and lemon

Baking salmon steaks, or indeed any fish, is a lot easier than frying or grilling them. Ten minutes in a gas mark 6/200C oven left these steaks tender and juicy. They are anointed with slivers of butter, salt and pepper, and soy sauce. I squeezed over some lemon juice at the end.

Saturday, March 24, 2012

Onion bhajis

These bhajis are adapted from an Angela Hartnett recipe in the Guardian. I made two bhajis with plain flour (which she suggests), and two with gluten-free flour. The gluten-free versions - perhaps gram flour would have been even better - were far superior: wheat flour produced a stodgy, crusty texture. I used more spice than the pinches Hartnett suggests.

1 onion, cut in half, sliced into half-moons, then quarter-moons
30g gluten-free flour
1/2tsp cumin seeds
1/2tsp coriander seeds
Pinch cayenne pepper
Salt
1 egg, beaten
200ml sunflower or groundnut oil


Warm the cumin and coriander in a small saucepan over a low heat, until they give off a spicy aroma. Grind them in a mortar.

In a bowl, mix the onion, flour, spices, and salt to taste. Gradually add the egg, stirring or mixing by hand until you have just enough to produce a squidgy and coherent mass. Divide it into four bhajis.

Warm the oil over a medium heat in a saucepan or frying pan. Put in a small piece of bread: if it sizzles, gently lower in the bhajis. Fry until brown, turning once.

Saturday, March 17, 2012

Lambs' liver and onions

I asked the price of calves' liver at my local butcher. £24 a kilo. The lambs' liver? £4.90. Choosing between them did not take very long. The quantity below, plenty for two people, cost less than £1.50.

Olive oil
4 red onions, sliced
Salt
1tbsp red wine vinegar
275g lambs' liver, cut into fork-sized slices
Handful of flat leaf parsley, chopped


Warm about 3tbsp of oil in a heavy casserole over a very low heat, and throw in the onions with half a tsp of salt. Stir, and cover. Continue to cook gently for 45 minutes to one hour, stirring regularly at first to ensure that the onions do not catch. You should find that as they collapse they throw off enough liquid in which to stew. (If not, add a tbsp or two of water or stock.) Indeed, you may find that there is too much liquid, in which case you can encourage it to evaporate by uncovering the pot.

Once you have a pot full of soft, sweet onions, moist rather than runny, add the vinegar and allow it to evaporate for a couple of minutes. (It is pretentious to call this, as some do, an onion "confit", because no preservation - the process that the name implies - is involved.)

If you were cooking calves' liver, you would flash-fry it in butter in a separate pan, stir it into the onions, and serve immediately. But you may want to cook lambs' liver slightly more thoroughly. Simply stir it into the onions, cover the casserole again, and stew for about 10 minutes, or until cooked through but still tender. Stir in the parsley, and serve.

You may want to add black pepper with the liver. Or you could go for a goulash theme, adding a tbsp of paprika once the onions have collapsed, with a dollop or two of sour cream stirred in at the end.

Saturday, March 10, 2012

Bean salad

Tinned beans have a somewhat mealy texture. Dried beans would be better here; but you're not likely to want to go to the trouble of preparing them if all you're making is a light lunch.

1 tin cannellini beans, drained
4 spring onions, sliced and soaked in boiling water for about 15 minutes (the water tames their acidity), drained
Handful of Greek-style black olives, pitted
Handful of flat-leaf parsley, washed and chopped
Black pepper


Vinaigrette
1dstsp red or white wine vinegar
Salt
1/5tsp honey
1/4tsp Dijon mustard
2tsp sunflower oil
1tsp extra virgin olive oil


Put the salad ingredients into a bowl.

I usually make my vinaigrette in a jar. Put in the vinegar, add salt to taste, and the honey and mustard. Stir to dissolve them. Add the oils, put on the lid, and shake the jar to amalgamate the dressing.

Pour the dressing over the salad, and toss.

Saturday, March 03, 2012

Kerala fish curry


Adapted from Madhur Jaffrey's Curry Easy. Jaffrey suggests sea bass; I used cheap white fish - pouting, and a bit of hake. I didn't want to use only 120ml of coconut milk - what was I to do with the rest of the tin? So my dish includes creamed coconut, which gives the sauce a slightly powdery, but not unpleasant, texture.

For 2.

300-350g white fish, cut into fork-sized pieces
Salt
2tbsp olive or sunflower oil
2 banana shallots, sliced
2tsp grated ginger (double the quantity that Jaffrey gives)
1 clove garlic, chopped
200ml water
50g creamed coconut
1/2tsp ground turmeric
Cayenne pepper to taste
Ground black pepper to taste
1tbsp paprika
1tbsp lemon juice


Sprinkle 1/2 tsp salt over the fish, and toss. (I suppose that the salt is meant to draw out some of the liquid.)

Put the oil into a saucepan or casserole dish and set over a medium heat. Throw in the shallots, and fry, stirring very regularly, until bits of them turn brown. Add the ginger and garlic, and cook for a further minute. Add all the other ingredients, bring to a simmer, and continue to simmer with the pan covered for 15 minutes.

Add the fish, and stir it thoroughly into the stew. No need to turn up the heat again; simply cover the pan. The fish may well be cooked through after five minutes.

This curry is delicious: creamy, but with the creaminess cut by the peppers, ginger, and lemon juice.

Saturday, February 25, 2012

Potato cakes with cheese

Cheese in a potato cake mixture may, as it cooks, cause the cakes to break up and stick to the pan. Better to lay the cheese on top, and grill it.

Use a heaped tbsp of flour for each medium (140g, say) potato. Peel the potatoes, cut them into similarly sized pieces, cover with cold water in a saucepan, add a little salt, bring to a simmer, and cook until soft. Drain, and allow to dry. Return to the pan, and mash with a hand-masher or, for a smoother result, with a food mill or potato ricer.

Stir in the flour with a little salt. Pick up the mixture by the handful, forming each into a palm-sized, flattish cake. You'll get about three for each potato. The kneading will develop some gluten, which will help the cakes to cohere.

Fry the cakes in a little oil and butter, over a low to medium heat, until brown on each side.

Put the cakes into a lined grill pan. Lay slices of cheese on top of them, and grill under a low flame until the cheese melts.

Saturday, February 18, 2012

Ricotta pudding

This recipe is adapted from one in Claudia Roden's The Food of Italy (she says it's from Sardinia), the main differences being that I had a 225g packet of ricotta rather than the 300g she specifies, and that I thought that 300g of honey was twice as much as I wanted.

My flan dish (22cm) may be larger than the one she uses (she doesn't give a measurement), because my pudding was ready in 30 minutes rather than the 45 she suggests.

225g ricotta
100g ground almonds
150g honey
3 eggs
Juice of one orange


Mix all the ingredients. Or, for a smoother result, put the ricotta through the blender, then add the rest of the ingredients.

Lightly oil a flan dish. Pour in the ricotta mixture, and bake at gas mark 6/200C for 30 minutes, or until golden and firm.

Cakes and puddings made with ground almonds can be somewhat dry. This is deliciously moist, with a sweet tang.

Saturday, February 11, 2012

Potato ricer

I am so dense and obtuse when it comes to practical matters - and not only them, often - that I had owned this piece of equipment a month before realising that I could rest it on the saucepan, as illustrated. This feature is helpful, enabling you to feed the ricer several times without spraying bits of mash round the kitchen.

If cooking for more than one person, you'll need to mash your potato in batches, because you get better results if you do not fill the container. Even then, I find, bits of potato seep over the top of the plunger rather than getting pushed through the mesh, and have to be scraped back.

A food mill will cope with larger quantities of potato, while also producing very smooth results. It's more of a nuisance to clean, though.

Sunday, February 05, 2012

Pork, lemon, and garlic stew

This recipe appears in my book, Don't Sweat the Aubergine, about which I may have some more to say in the coming weeks. A new, revised edition appears in April from Black Swan.

I haven't revised this recipe, but I might have done. In the book, I suggest that you brown the pork before putting it in the casserole. But, not being submerged in liquid, it may brown to a certain extent while cooking anyway. So this version (serves 2) could not be simpler.

2 slices of boneless belly pork, each cut into about four pieces, or left whole if you prefer
2 onions, roughly chopped
1 head garlic, separated into cloves but not peeled.
1 lemon, quartered
1 bay leaf
1 sprig rosemary
1/2 chicken stock cube (optional)
2tbsp olive oil
Salt (remember if you use the cube that it is salty)


Toss the ingredients together in a heavy casserole, and bake, covered. I cooked my stew slowly, at gas mark 1/140C and then at gas mark S/130C, for three and a half hours. I turned down the dial once the stew was simmering, after about an hour and a quarter.

I confess that, after two and a half hours, there was little evidence of the browning I had expected. So I uncovered the casserole. I am reluctant to follow recipes that tell you to brown meat towards the end of the cooking time, fearing that the high temperature will cause the meat to dry out. But in this case, the temperature was low, and belly pork is a particularly forgiving cut. The surfaces of the meat browned in about half an hour, after which I turned it.

The meat, onions and lemon create plenty of sauce, which has a delicious tartness to offset the rich fattiness of the pork.

Saturday, January 28, 2012

Jasmine rice

As I mentioned in the fried rice entry, jasmine rice is sticky. Don't bother hoping that you will get separate grains; indeed, stickiness is useful, enabling you to pick up a clump of rice with chopsticks.

I was a little sceptical about the instructions on my packet of Biona jasmine rice: put the rice in a pan, cover it with twice its volume of water, bring to a simmer, cover, and leave on a low heat for 20 minutes. After that length of time, I suspected, a good deal of rice would be stuck. However, I tried it, turning down the flame as soon as bubbles reached the surface of the water, and inserting a heat disperser between pan and hob. It worked. Yes, I had to work loose some of the rice, but not with a chisel.

Basmati rice takes 10 minutes to soften, in my experience. Jasmine rice takes longer.

Saturday, January 21, 2012

Egg fried rice

The dish above does not look much like egg fried rice, and it did not taste much like it, either. It was good in its way, just not the authentic article.

I was inspired - prompted would be a better word - to make it by Felicity Cloake's article this week in the Guardian. I agree with Cloake's reservations about pouring the egg first into the very hot wok, and I was intrigued by her suggestion that you stir the egg and rice vigorously, so that the egg coats and is to a certain extent absorbed by the rice. This dish is not analogous to spaghetti carbonara, which has a sauce of creamy curds.

I did not want to use Cloake's recommended 500g of rice, even for three people. But I did think we should have an egg each. That may have been my first mistake. The second was not owning a wok, and making the dish in a big Le Creuset casserole. Cloake fries her rice until she has separate, slightly caramelised grains. It is not possible to achieve this result in the Le Creuset: as you cook, more and more of the egg and sticky rice adhere to the pan. I stopped at the stage you see above.

My one disagreement with her concerns her instruction about waiting until the oil smokes. Why cook with burned oil?

For the record, I used 250g of jasmine rice, cooked in the afternoon and allowed to cool - it becomes a rice cake. I heated my pan over a medium to high heat, poured in about 3tbsp of sunflower oil, and immediately tipped in the rice, stirring and breaking it up. Then I tipped in my three beaten eggs, stirring vigorously all the time. As I say above, I stopped when I felt there was a risk of getting a stodgy, stuck, burned clump. I stirred in chopped spring onions away from the heat.

Saturday, January 14, 2012

Spiced chicken with rice and lentils

This is a Hugh Fearnley-Whittingstall recipe from the Guardian, with a few adaptations. I used dried apricots rather than dates (not because I prefer them, but because I had some in the cupboard), and scaled down the quantities slightly. But I deviated most in my timings and quantities.

First, I made my dish with chicken drumsticks, which I allowed to cook in the spiced stock for 30 minutes before adding the lentils and rice. I like the meat to be very tender. I don't think I used as much as 4tbsp of oil, because the chicken exudes its own fat when frying.

The dish shown in the Guardian appears to be dry, but the quantity of stock specified, 700ml, is a lot more than 150g of rice and 80g of lentils will absorb. I decided to use just enough stock to cover the ingredients. I had to be sure that they would soften under these conditions, so I pre-soaked them (separately) for a couple of hours.

I used green lentils, which - pace Fearnley-Whittingstall - take longer to cook than does rice. I cooked them for 30 minutes, just covered with stock, and checking the liquid level regularly. Then I added the rice, pouring over just enough extra liquid to submerge it. Fearing that the ingredients would stick to the bottom of the casserole if left on the hob, I put the dish in the oven at this point, for a further 20 minutes at gas mark 4/180C.

The rice and lentils absorb all the fat, so be prepared to taste it as you eat them. It's not unpleasant. I'd have liked a little heat in the dish, perhaps from some cayenne pepper.

Sunday, January 08, 2012

Don't steep the coffee

There is a widely held view that you should leave coffee in a cafetière to steep for a while before pushing the plunger. Four minutes seems to be the most widely recommended period. I am not so sure. I find that coffee prepared in this way can be bitter. Instead, I use a high concentration of coffee (2 heaped tbsp of ground coffee for each mugful of about 300ml), give it a stir, and push the plunger almost immediately.* For breakfast, I pour about 150ml of warm milk into this strong brew.

I apply the same principle to tea. Making a (smaller) mug of tea for myself, I put 2tsp of leaves into a small jug, pour in hot water (as with coffee, the water should be just below boiling point, I believe), give it a stir, and again pour it (this time through a strainer) right away.

*This idea is not mine, I admit. I got it from Victoria Moore, who explains it in a video here. I also follow her tip about warming the pot and rinsing the plunger.

Monday, January 02, 2012

Lamb with yoghurt, cardamom, and ginger

This is a recipe from Madhur Jaffrey's Curry Easy. I've given her version, with my comments in italics; my version included three pieces of neck of lamb rather than lamb shanks, with the other quantities scaled down accordingly.

In spite of my reservations about the recipe as it stands, I'd like to give it another go. The sauce has an appealing zing and fragrance, thanks to the large quantities of ginger, cardamom, and coriander.

4 medium lamb shanks
Salt and freshly ground black pepper
350ml Greek or other thick yoghurt
6 cloves garlic, peeled and chopped
7.5cm piece fresh ginger, peeled and chopped
3tbsp ground coriander
2tsp ground cumin
1/2tsp cayenne pepper
4tbsp olive or rapeseed oil
10 cardomom pods
1/2tsp black peppercorns
2 x 7.5cm cinnamon sticks
1/2tsp cloves
1 medium onion, peeled and sliced into fine half-rings


Pat the lamb shanks dry with kitchen paper. Sprinkle all over with 1/2tsp salt and lots of freshly ground black pepper. I seasoned my lamb with a little salt only; ground pepper, stewed, can become bitter.

Preheat the oven to 160C/gas mark 3. I baked my curry at this setting for 30 minutes, by which time it was simmering. At that point, I turned down the oven to gas mark S/130C.

Put 120ml of the yoghurt, the garlic and ginger into a blender, and blend until smooth. Add the coriander, cumin, cayenne pepper, one and a half tsp of salt, and the rest of the yoghurt. Blend to mix. I used whole coriander and cumin, lightly toasted in a dry saucepan and ground with a pestle and mortar.

Put the oil [this is a lot, given the fattiness of the meat; I used only a tbsp, of sunflower oil] in a casserole large enough to hold the meat, and place over a medium heat. When hot, put in the cardamom, peppercorns, cinnamon, cloves, and the shanks, and brown them on one side. Turn them over, dropping the onion slices in the spaces between them. Brown both meat and onions, moving them around the pan as you need to.

This is a tricky way to brown the meat and onion. You are likely to find, no matter how carefully you stir, that bits of onion and spice catch on the casserole and burn. I'd be inclined to coat the meat with a little oil and brown it on a grill pan, quickly, while frying the onions and spices separately in the casserole. Or, if the liquid is not going to cover the meat, to allow the browning process to take place inside the covered casserole.

Add the paste from the blender and 250ml water. I'd prefer to use stock, or even, dare I say it, a diluted, halved stock cube. Bring to a simmer. Cover the casserole, and place it in the oven for three hours, turning the shanks every 30 minutes.

The yoghurt split, of course. One way of trying to prevent the separation - but not one I can guarantee, having not tried it for a while - is to add a dstp of flour (gram or cornflour, preferably) to the yoghurt mix. Another is to add the garlic, ginger and spices to the casserole with the water or stock, while holding back the yoghurt to the end. Take the cooked dish out of the oven, let the simmering subside, add a little sauce to the yoghurt, then add some more, and then pour this yoghurt and sauce mixture into the casserole. If you want to warm the dish again, make sure you do not allow the sauce to bubble.

Friday, December 23, 2011

Christmas tips

Here is a column I wrote for the New Statesman in 2006 (here is the original). It may be of some use, or reassurance.

The most stressful cooking experience of the year approaches. In search of inspiration and reassurance, one turns to the Christmas cookery specials in the press - and finds complex timetables of tasks stretching over several days. But this is not an end-of-year cookery exam. It is a meal, albeit a big one, for family and possibly friends. Here, with apologies to vegetarians, are a few tips about what is worth doing, and about what you can happily neglect.

The turkey: The key point is to get it off to a good start. Take it out of the fridge the previous night. Turn up the oven to full heat for half an hour, and then adjust it to gas mark 6/200°C when you put in the turkey. After half an hour, you can turn the dial to as low as gas mark 2/150°C for the remainder of the cooking time. The rule of thumb is 20 minutes for each 500g and 20 minutes extra; but, with larger birds, the time side of this ratio decreases.

How do you stop the breast meat drying out? You cannot, entirely. Ignore instructions to cover all or part of the turkey in foil: they are based on the erroneous assumption that a moist environment keeps meat moist. In fact, moisture has the opposite effect, because it cooks so efficiently. I am not convinced that turning the bird during cooking has any effect, either - so that is another job you do not have to worry about. But it is a good idea to slide butter, and perhaps a couple of rashers of bacon, between the skin and the breast.

Is the bird ready an hour early? Excellent. Loosely covered in foil, it will retain heat for that time; and, in any event, lukewarm meat is fine, provided you have hot gravy.

Gravy: You do not have to thicken it. Flour numbs flavour. So making the gravy is very simple: tip the juices from the roasting pan into a bowl; deglaze the pan with water or wine, and add these juices to the bowl; when the fat rises, get rid of most of it; thin these juices with stock, made from giblets and/or the wings of the turkey (or vegetables, if you like). You can heat up this mixture at the end.

Potatoes: Parboil them, and let them dry. You have time to roast them while the turkey rests.

Stuffing: Put this into a gratin dish, which goes into the oven (below the potatoes) when the turkey comes out. Make bread sauce* in advance, remembering that it will thicken.

So, for the climax, the only new things you have to cook are the inevitable sprouts, and perhaps some glazed carrots. Get your assistants to take through the turkey, vegetables and stuffing, and to start the carving. Meanwhile, warm the bread sauce and the gravy.

Pudding: Make a lemon mousse the day before. You've already had bread sauce and stuffing; leave the starchy Christmas pud for later.

*Bread sauce - Put 400ml of milk into a saucepan. Add an onion studded with a couple of cloves, a bay leaf, a few peppercorns, and some scrapings of nutmeg or mace. Bring slowly to a simmer. Turn off the heat, cover, and leave for 30 minutes or longer.

Remove the flavourings, and throw in breadcrumbs. (You'll have to use your judgement on the quantity, bearing in mind that the sauce will thicken, and continue to thicken if you let it cool again before warming it later.) Bring to a simmer once more, adding more breadcrumbs or milk until you achieve the consistency you like. Check the seasoning; you may not need much salt, because bread is salty. Finish the sauce with a knob of butter, or some cream.

Saturday, December 17, 2011

Scrambled eggs from a frying pan

Scrambling eggs requires fine judgement. You have to catch them at the moment when they are no longer runny but before the curds set and harden. The curds should be fluffy, holding the liquid content in suspension.

It is easier to spot the arrival of this state if you cook the eggs in a (non-stick) frying pan, I have found. It is certainly a good idea to avoid using a saucepan with a small base, which will not allow you to heat the egg evenly, no matter how thoroughly you stir. Of course, you could try using a larger saucepan. But I think that the gentler stirring that the frying pan encourages (so that the egg does not slop over the side) produces a better result, because overbeating results in a less pleasing, porridgy texture. The process is rather like cooking an omelette, only continuing the first stage (stirring, and pushing the set egg around to give the rest access to the base of the pan) throughout.

I admit that I've bumped up the contrast on this picture. But these eggs, which come from Nantclyd Organics, really are very rich and yellow.

Scrambled egg recipe here.

Sunday, December 11, 2011

Constance Spry's honey cake

My guess is that the foodie in your life, unwrapping a book on Christmas day, would be moderately pleased to find the latest offering from a celebrity chef, but absolutely delighted to find The Constance Spry Cookbook, just out in a new hardback edition from Grub Street. This 1956 kitchen bible remains the most prized work of its kind in numerous kitchens. Even if your foodie already has a copy, he or she will welcome a new one, because the old one is probably showing the effects of heavy usage.

Here is Constance Spry's honey cake.

3 eggs
2tbsp caster sugar
3tbsp honey
Grated rind of half a lemon
50g cornflour
65g plain flour


Separate the eggs. Cream the yolks with the sugar, honey, and lemon rind until white and expanded. I did this with a stick blender, which is far less appropriate for the job than a hand-held electric whisk would be. In theory, the yolks will whiten, and the volume of the mixture will expand considerably. My mixture got only some of the way towards this state before I gave up.

Fold in the cornflour.

Whip the whites until they form peaks (see here). Tip in the egg mixture with the plain flour, and fold everything together gently, until well amalgamated. The mixture is quite loose.

Spry does not specify the size of the cake tin. I used a 20cm springform one. Line the bottom with greaseproof paper cut into a disc (see here), grease the sides with a little vegetable oil, and pour in the cake mixture. Put the tin on to a baking sheet, and bake in a gas mark 3/170C oven for 35-40 minutes, or until set. (As you can see, I overdid it somewhat.) Allow to cool before turning out.

The honey compensates to a certain extent for the slightly dry texture of this butter-less cake. Still, it would be a good idea to serve it with cream, or buttercream, or perhaps a fruity concoction. The lack of butter, which is an anti-staling agent, means that you need to eat the cake soon after you've baked it.

Sunday, December 04, 2011

Poached egg with spiced cabbage

Madhur Jaffrey suggests this combination (or rather, eggs with any kinds of spiced vegetables, including leftovers), in her book Curry Easy.

I used a quarter of a cabbage, finely chopped and washed; 1 clove of garlic, chopped; 1tsp mustard seed; 1tsp cumin seeds; a few pinches of ground ginger; cayenne pepper; and salt. Normally, I like to soften cabbage by boiling or steaming it, if only briefly; but here I prefer the crunchier texture and more assertive flavour that results from simply cooking the cabbage in the spiced oil. (Of course, the washed cabbage will introduce some water, which will soon evaporate.)

The earthenware dish in the picture will go on the hob. I warmed about a tbsp of sunflower oil in it over a low to medium heat, and cooked the garlic, mustard seed, and cumin for a minute. I threw in the cabbage, with the ginger, cayenne, and salt, and cooked it for a further eight minutes or so. The cabbage cooked down and became glossy with the oil and spices. I turned down the heat towards the end, as the cabbage threatened to catch.

For the eggs: I broke two eggs into separate cups, and slipped them into a saucepan of boiling water (with no salt, or vinegar - see this entry and the note it refers to). When the water was on the point of returning to a simmer, I turned off the heat, covered the pan, and left it for five minutes. I lifted the eggs one-by-one from the pan with a slotted spoon, shaking them gently to get rid of excess water, and placed them on the cabbage.

Saturday, November 26, 2011

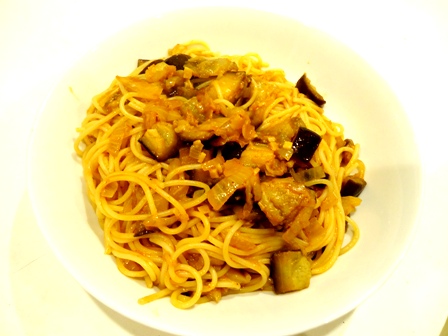
Spaghetti with aubergine and harissa

The single portion in the picture contains a whole onion and a whole aubergine (a medium one). As you can see, the quantity is not excessive once the vegetables have cooked down.

I prepared the aubergines according to my newly discovered, saucepan method. The anchovy is there to add some depth of flavour, not to provide fishiness.

2tbsp olive oil
1 clove garlic, chopped
1 medium onion, sliced
1 anchovy, drained
1 medium aubergine
Salt
1tsp harissa
125g spaghetti
Parmesan cheese, grated


Warm the oil in a heavy saucepan over a gentle heat. Throw in the garlic, and let it sizzle gently for 30 seconds or so. Add the onions, and cook for five minutes, or until they start to soften. Stir in the anchovy, and mash it up.

While the onion is cooking, cut the aubergine into small cubes. Tip them into the pan containing the onions, add the salt (to taste) and harissa, give everything a good stir, and put on the lid. Continue to cook, over a gentle heat and with the lid on the pan, stirring regularly. There should be enough liquid and steam from the onions to prevent the vegetables from sticking. The aubergines will be thoroughly soft in 15 to 20 minutes.

Cook the spaghetti according to the packet instructions. Drain, and toss with the vegetables. Serve with the cheese to sprinkle on top.

You could use dried, whizzed chillis instead of the harissa. Or some cayenne pepper. If you don't like hot things, you may need some other ingredient instead - a dstsp of tomato paste, say.

Saturday, November 19, 2011

Chocolate cake, refined

I have learned a little bit more about how cakes work from revising and expanding my cookbook, Don't Sweat the Aubergine, for a new edition to be published by Black Swan in the spring. It made me think again about Elizabeth David's simple and delicious chocolate cake, which is often somewhat compacted after a day or so. If the egg foam cannot sustain an airy texture for very long, would the cake not benefit if one creamed the butter and sugar as well? Indeed it would. I have added a note to the original recipe.

Sunday, November 13, 2011

Faster beetroot

The other day, I cooked a very large beetroot. I gave it a quick wash, put it in a pan half filled with boiling, salted water, and part-boiled, part-steamed it with the lid on. It took the best part of two hours.

On Thursday, I read this recipe by Angela Hartnett in the Guardian. You wash the beetroot, cut it in quarters, and cook it in olive oil, thyme, vinegar and water. Hartnett suggests that quarters of a medium beetroot will cook in about 15 minutes.

The quicker you cook vegetables, the better, is the usual rule - certainly as far as nutritional value is concerned. My doubt here is the juice that leaks into the water through the cut surface of the beetroot. But perhaps plenty of juice leaks out during the longer cooking period anyway. (Baking beetroot wrapped in foil does not produce a notably juicier result, in my experience.)

I tried the Hartnett method. But my quartered beetroot was nowhere near cooked after 15 minutes; nor after 30 minutes. It occurred to me that the vinegar was the problem: acidity is a highly effective delayer of the softening process.

Eventually, I ran out of patience, and drained the beetroots while they were still quite firm. Angela Hartnett makes no mention of peeling, but I did peel mine, once they were cool.

The result was good. I'll certainly try this quartering method again, leaving out the vinegar, in the hope that the flavour did not depend on it.

Sunday, November 06, 2011

Squash and tahini paste

This is an adaptation of a Yotam Ottolenghi recipe in the Guardian. I spiced it with cumin rather than cinnamon; because we were eating it at lunchtime, I left out the garlic; and I didn't garnish it with sesame seeds, date syrup, and coriander. It was still delicious and, as Ottolenghi says, moreish.

Also, I didn't cut up the squash before baking it, figuring that I would waste less of the flesh if I were able to scoop it, softened, out of the shells. But it took a long time to cook. I gave it half an hour at gas mark 6/200C, with the roasting tin covered in foil; then I uncovered the tin, but turned down the oven to gas mark 3/160, and waited another 30 minutes; discovering that the flesh was still not tender, I covered the tin again, turned up the oven back to 200C, and waited for a further 30 minutes. That did it.

The two halves of squash in the picture are anointed with about a dstsp of olive oil, half a tsp of cumin seeds, and salt and pepper. I scooped the flesh into a small vegetable mill, and whizzed it. I added a tbsp of yoghurt, and whizzed again. I added a tbsp of tahini paste (it is easier to merge this thick paste with a substance that is already blended), and whizzed for a final time.

Saturday, October 29, 2011

Coconut chicken curry

This is a one-pot meal, to be served in bowls and eaten with a spoon. What surprised me was that the potatoes took a while to soften - I had thought that the coconut milk would tenderise them, but perhaps I acidified the liquid with the other ingredients. (If you want crunchy potatoes, try cooking them in tomato sauce.) Nevertheless, I think that new potatoes, which hold their shape, are the kind to go for here.

Serves 2, generously.

Spices

1tsp cumin seeds
1/2tsp mustard seeds
6 cardamom pods
1tsp turmeric
1/6tsp asafoetida
1/4tsp dried ginger, or (better) fresh
Cayenne pepper to taste

Sunflower oil
1 clove garlic, chopped
1 onion, chopped
1 tin coconut milk
150ml chicken stock (I confess I used half a cube and 150ml water)
2 sweet peppers, deseeded and cut into fork-sized pieces
8 new potatoes, cut into fork-sized pieces
1 tin chickpeas, drained
Salt
1 large chicken supreme, cut into fork-sized pieces
3 spring onions, chopped
Chillis, chopped
1tbsp lime juice


Warm the cumin and mustard seeds in a saucepan over a gentle heat, until toasted. Grind them, with the cardamom, in a mortar.

In a large saucepan or casserole, warm about 2 tbsps of sunflower oil over a gentle heat, throw in the garlic, and then the onion. Cook gently, stirring, and adding a bit more oil if it threatens to catch. When the onion is soft, tip in the cumin, mustard seeds and cardamom, and cook gently, again stirring, for about three minutes.

Pour in the coconut milk and stock. Add the peppers, potatoes, and chickpeas, as well as the remaining spices. Bring to a simmer, and add salt cautiously (the chick peas will have been canned in salty water, and the stock cube, if you used one, is salty too). Cover, and simmer gently for 15 minutes. Add the chicken and spring onions, and simmer for a further 15 minutes, or until the potatoes are tender and the chicken is cooked through.

Turn off the heat. Stir through the chillis (as many as you like), and the lime juice. Coriander would be nice, too.

Saturday, October 22, 2011

Aubergines in the pan

I find frying cubes of aubergines unsatisfactory. As everyone who has cooked them knows, aubergines absorb a great deal of oil; then they stick to the pan. It is not an efficient way of softening them. My usual method - in this recipe, for example - is to toss them in oil and to bake them.

However, it occured to me the other day that I could cook them in a pan if the pan offered a moist environment, such as that created by softened onions. The pan in the picture contains two red onions, softened in olive oil with some garlic. I threw in the aubergines, tossed them in the oily onions, and covered the pan, cooking them over a low flame. I stirred them from time to time. In 15 to 20 minutes they were soft, and with a more melting texture than you get when you bake them.

Saturday, October 08, 2011

Lentil stew with morcilla

Morcilla is a Spanish black pudding. The stuff I bought came in balls tied with string.
Puy lentils take longer to cook than is stated on the packets and in most recipes, in my experience. Soaking speeds the process of tenderising them. It also ensures that they absorb less liquid while cooking: you can barely cover them, and be reasonably confident that they will soften. If your water is hard, you may get better results if you use filtered water.

Serves two.

Olive oil
1 clove garlic, chopped
1 medium onion, chopped
150g Puy lentils, soaked for two hours or longer
Chicken stock
150g morcilla
Salt
Pepper
Handful of flat-leaf parsley, chopped


Warm about 2tbsps of olive oil in a heavy pan, throw in the garlic, let it sizzle gently for a minute, and throw in the onion. Cook over a low heat until the onion starts to soften - five to 10 minutes. If the onion threatens to catch, add more oil.

Drain and rinse the lentils. Tip them into the pan, and pour in just enough stock to cover. Bring to a simmer, put a lid on the pan, and simmer gently until the lentils soften. It may take 20 to 30 minutes. Add more stock if the top layer of lentils becomes exposed.

Once the lentils are soft or nearly there, you may want to uncover the pan and turn up the heat slightly, to get a less soupy consistency. You'll need to stir the lentils regularly, because they'll catch as the liquid evaporates and the stew thickens.

Add salt to taste. (But I must admit that I've never properly tested the theory that salt added at an earlier stage compromises the texture of lentils, as it does dried beans.)

Cut the morcilla into fork-sized pieces, submerge them in the lentils, and give them five minutes to warm through. Stir in the chopped parsley. The stew would benefit from plenty of pepper; I stirred harissa into mine.

Saturday, October 01, 2011

Flipping an omelette

My usual method for preparing a slow-cooked omelette such as a frittata is to put it on the lowest flame on the hob until the underside is set, and to finish it under the grill. But recently I was at a party for which someone had prepared the most delicious tortilla; and he told me - as if anyone who performed the task differently was guilty of a bizarre solecism - that he always flipped the tortilla, with the help of a plate. So I tried it with the above frittata, consisting simply of eggs and Gruyere.

You place the plate over the pan, and flip pan and plate rapidly. The omelette is slippery at this stage, and can slide off the plate altogether. It is runny too: runny egg remains on the plate when you return the omelette to the pan, and has to be scraped off, back over the omelette.

Is this omelette more tender than the grilled version? It will be if you tend to grill it too fiercely. Otherwise, I'm not sure.

Saturday, September 24, 2011

Pork and marinade

If you barbecue a thick or tough cut of meat, you may well need to cook it first, before marinating it and subjecting it to the fiercely hot coals. But what if you are cooking it indoors? Do you still need a two-stage process, when you can get decent results by simply putting the marinated meat in a low to medium oven?

I often buy spare rib chops, cut them into pieces, coat them in a marinade, and cook them in a low oven. But this cut gives off quite a bit of liquid, which you have to allow to evaporate before the meat browns and the marinade turns sticky. You don't know how long that will take, and you may have to fiddle with the oven temperature to speed the process. The pork can become tough.

I poached four chops (in a pot with a chicken carcass - they contributed to the resultant stock) for about 50 minutes. Then I cut them up and marinated them. Later I cooked them under the grill until browned and warmed through, first on a high heat, then on a lower one.

It works better than the one-stage method, I think. The meat is more tender, and the marinade penetrates it more efficiently.

Marinade recipes here and here.

Saturday, September 17, 2011

Stuffed courgette

We received this yellow courgette, the size of a small marrow, in our vegetable box. It would be useless for sautéing in the normal way, because it is too watery. But it is fine for stuffing. You can scoop out the flesh much more easily than you would that of, say, an aubergine.

My stuffing consisted of the flesh and ingredients I happened to have in the house: olive oil, 1 red onion, 1 chopped clove of garlic, 75g rice, 60g diced Gruyere, a tbsp of cream cheese (I'm not sure that this was a good idea, but I thought the bit left in the tub needed using), salt, cayenne pepper. Extra or substitutional ingredients might have been pre-soaked raisins, toasted pine nuts, a few anchovies, and herbs such as flat-leaf parsley, tarragon, or thyme.

Cook the rice in the normal way. (There's plenty of advice, only some of it inconsistent, on this blog.) Meanwhile, finely chop the onion, and gently cook it with the garlic in a tbsp or two of olive oil. Chop up the courgette flesh, throw it into the pan, and gradually turn up the heat as it exudes water. Cook it on a high heat until the water evaporates. Stir in the rice, cheese, and seasoning.

Put the courgette halves in a baking dish or roasting tin, and stuff them with the mixture. Pour boiling water into the dish to a depth of between 50mm and 1cm. Bake at gas mark 6/200C for about 25 minutes, or until the courgette is soft and the stuffing is slightly browned on top.

Saturday, September 10, 2011

Greengage sponge

Figuring that a sponge pudding is simply a sponge cake, steamed rather than baked, I made this slightly raggedy but deliciously gungy effort according to the classic sponge recipe: in imperial measurements, four ounces each of butter, sugar, and flour, and two eggs. What worried me was the liquid from the greengages. But my batter was pretty stiff, and the greengages imparted the stickiness that you want in a pudding of this kind.

I realise that greengages are over now. You could use other kinds of plums, such as Victorias or damsons.

Serves 4.

115g butter
115g caster sugar
2 eggs
115g self-raising flour
1tsp vanilla essence
12 greengages (mine were small), halved and stoned

Cream the butter and sugar. I do this in a food processor: the mixture turns pale, then coheres into a ball, and then smears itself on the sides of the bowl. I stop at this point, and scrape it into a mixing bowl.

I cleaned the food processor bowl, fixed the whisk attachment, and whisked the eggs for about five minutes, until they had doubled in volume and were airy. Whether this effort to introduce more air to the sponge was worthwhile, I do not know. It is possible that the air bubbles collapse as soon as you stir the eggs with the other ingredients.

Pour the eggs into the creamed butter and sugar, tip in the flour, add the vanilla, and stir until you have a thick batter with no lumps. Gently stir in the greengage halves.

Grease a 1 pint pudding bowl with a little sunflower oil. Pour in the batter. Wrap the bowl in greaseproof paper, and then in three layers of foil.

Put the bowl into a saucepan. Pour in boiling water to come half way up the sides. Cover the pan, and simmer over a gentle heat for one hour.

Saturday, September 03, 2011

Carbonnade Nimoise

My final Elizabeth David recipe (which I forgot to photograph) from our holiday was a stew, though not one cooked in beer as the name may suggest. It originates from Nimes, home also of brandade of salt cod (as featured here last week), and involves, in David's book, lamb or mutton from the leg. I used chops from the middle neck. The garlic and rosemary are also my adaptations. You must use new, waxy, potatoes, which can hold up even after stewing for three hours, at the end of which they are deliciously imbued with fat and meat juice. For 4.

4 middle neck lamb chops
1 packet lardons or pancetta; or better, 100g of pancetta chopped into cubes
1 head garlic, separated into cloves
Potatoes for 4, peeled (or scraped) and cut into cubes
2 sprigs rosemary
2tbsp olive oil
Salt, pepper if you like (I usually add pepper on my plate)


This is a wonderfully simple dish. You toss everything in the oil, lay it out in a layer in a large baking dish, and brown the meat by starting it off at gas mark 8/230C for 20 minutes. Then you cover the dish with foil (or with a lid if it has one), and continue to cook at the lowest possible heat (my oven will simmer a stew at its lowest setting, gas mark S) for about three hours. That's it.

You might include other vegetables. My advice is to avoid carrots, which go dull if cooked for too long.